Many of you have been already asking yourself this question, how to upload a landscape video to Instagram Reels?
Is it possible to upload a horizontal video to Instagram Reels? Are you allowed to even do it?
Today, I will be answering these question, as well as sharing some tips that you should start implementing to grow an audience on Instagram.
You can do this on a computer or a smartphone, today, we will only be talking about how to do it on a smartphone, with free apps.
Contents
Instagram Reels landscape videos for iOS users:
Method: Splice by GoPro
The app we will be using is called Splice, which is a video editor by GoPro.
If you have an iPhone you can simply search for the term “splice.”
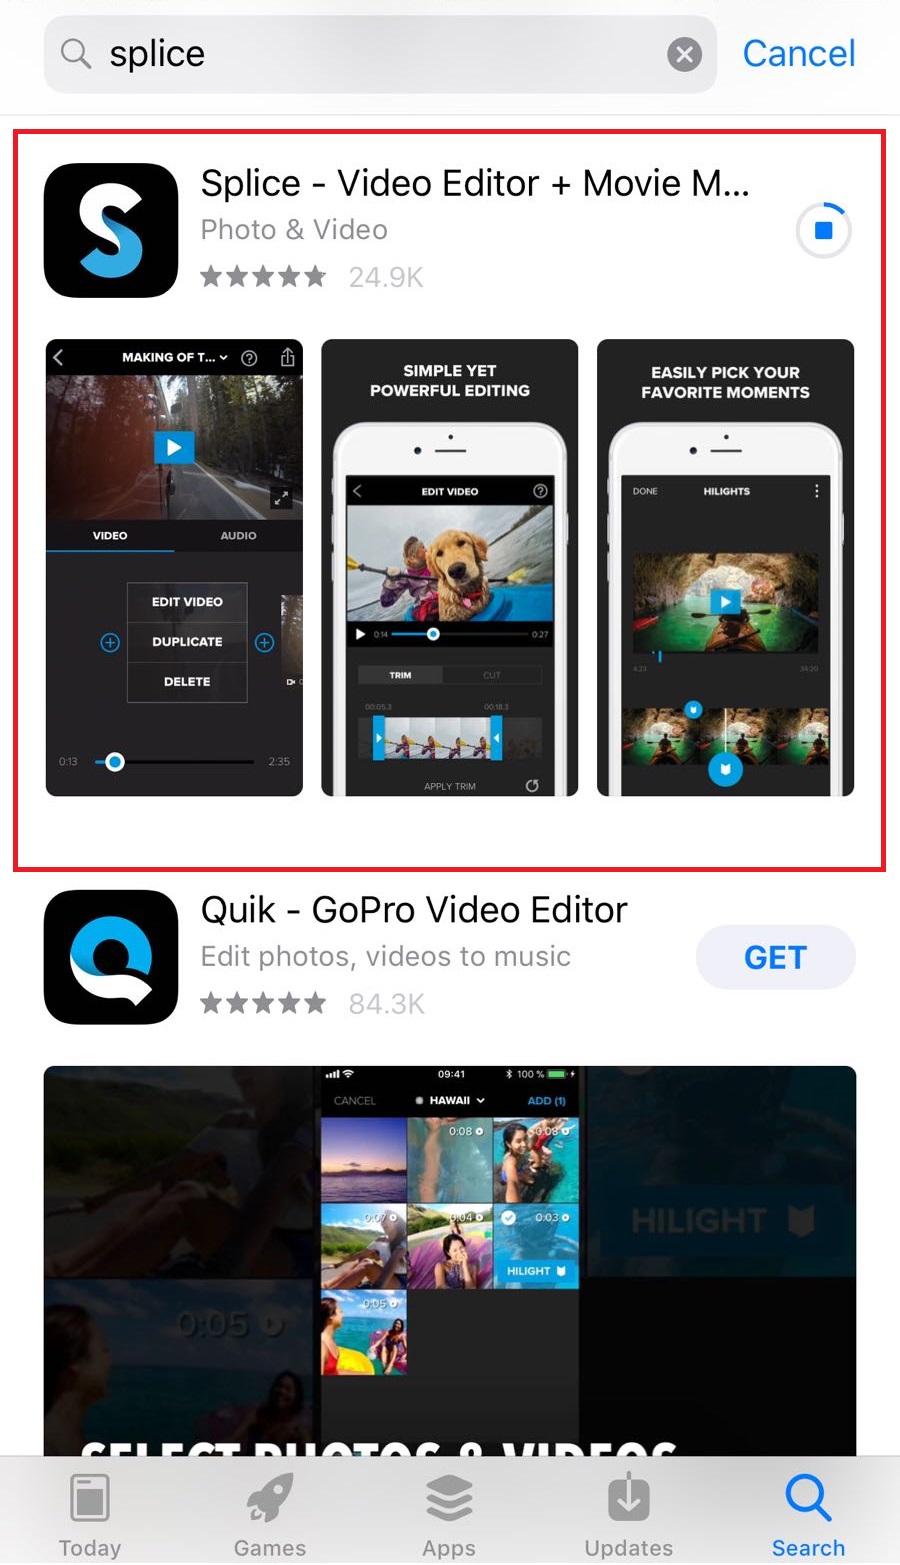
If you already have it, then go to step one, but if not, just go to the app store, and download it.
Step 1: Start a new project
You might have to give the app some permissions first, but you will eventually see this next screen.
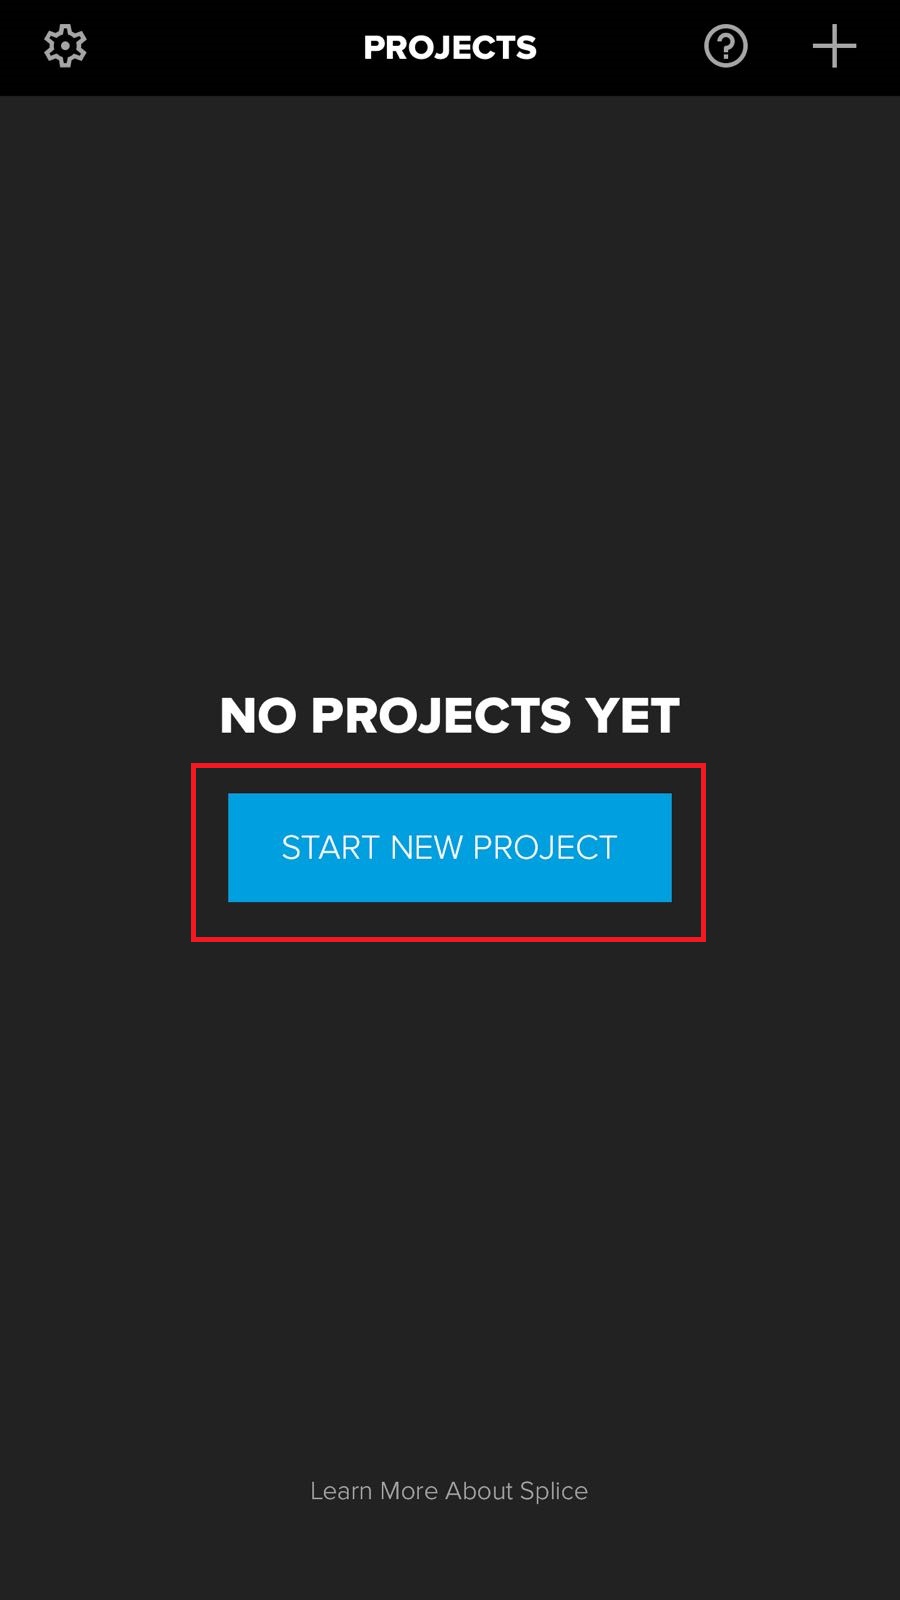
Once you see it, press on start new project so you can start selecting your videos.
Pro Tip: This app lets you do more editing than just this, but if I was you, I would do one thing at the time. I would edit my video, and then I would do the landscape on a portrait format editing.
Step 2: Select your video
On this step, simply select the video that you want to upload to Instagram and then click on add.
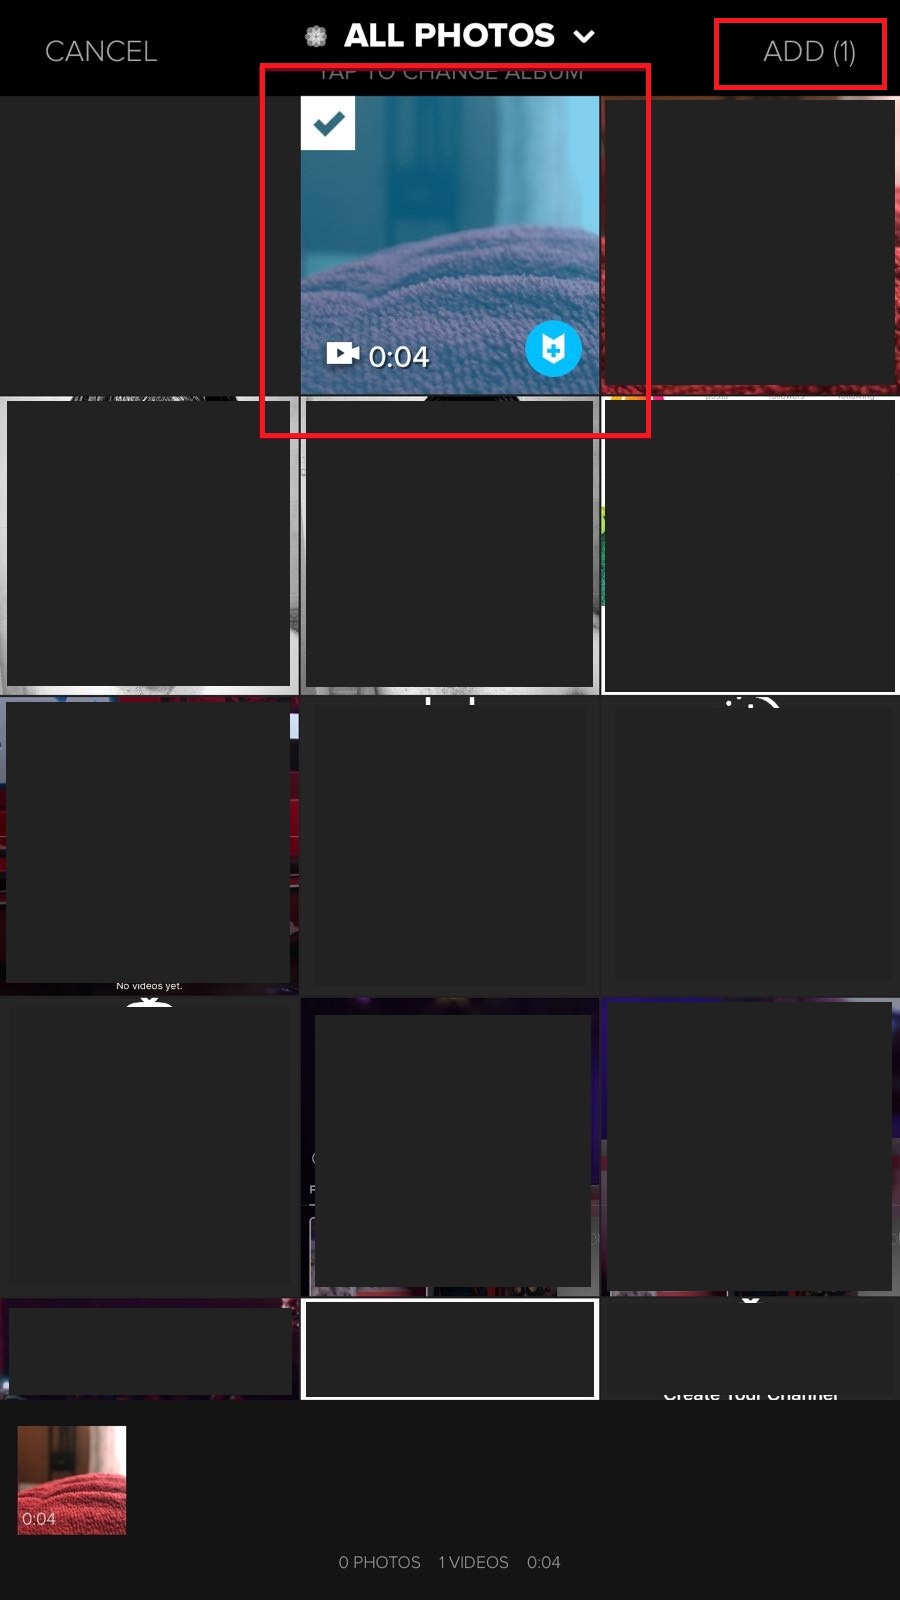
Once you clicked on “add”, the app will take you to this next screen.
If you already selected your full video with its own music, then click skip, but if you want, you can add whatever music you want, right now.
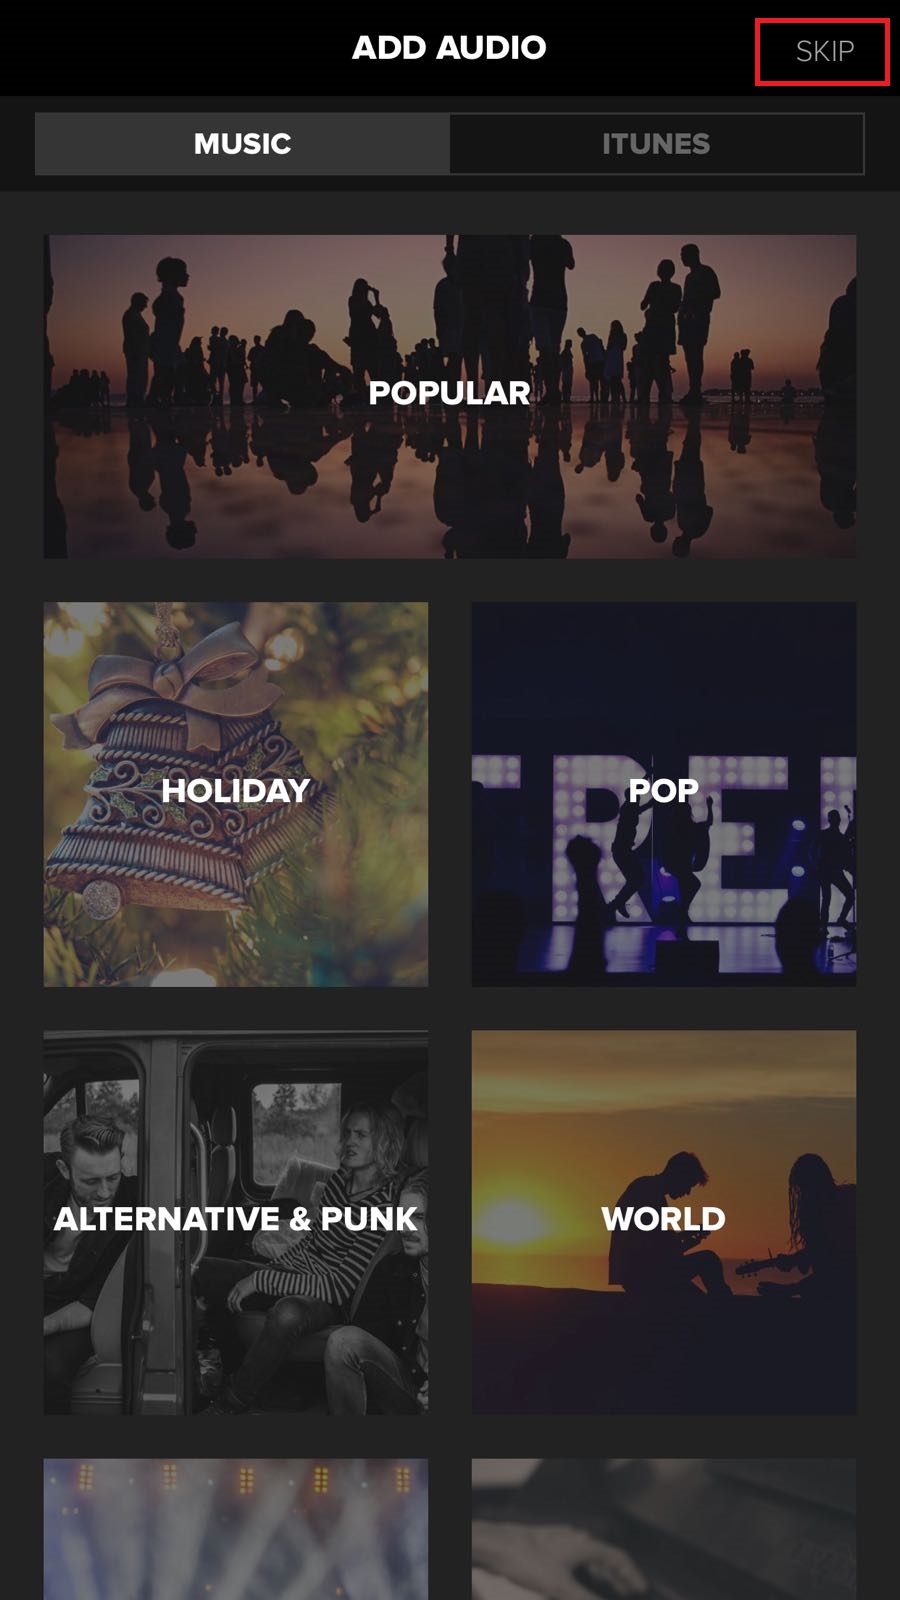
After you pressed skip, you will be taken to your project settings, which is our step 3.
Step 3: Project settings
The first thing you will notice in this next image is that there are two colors red and blue. Let’s talk about each of those settings.
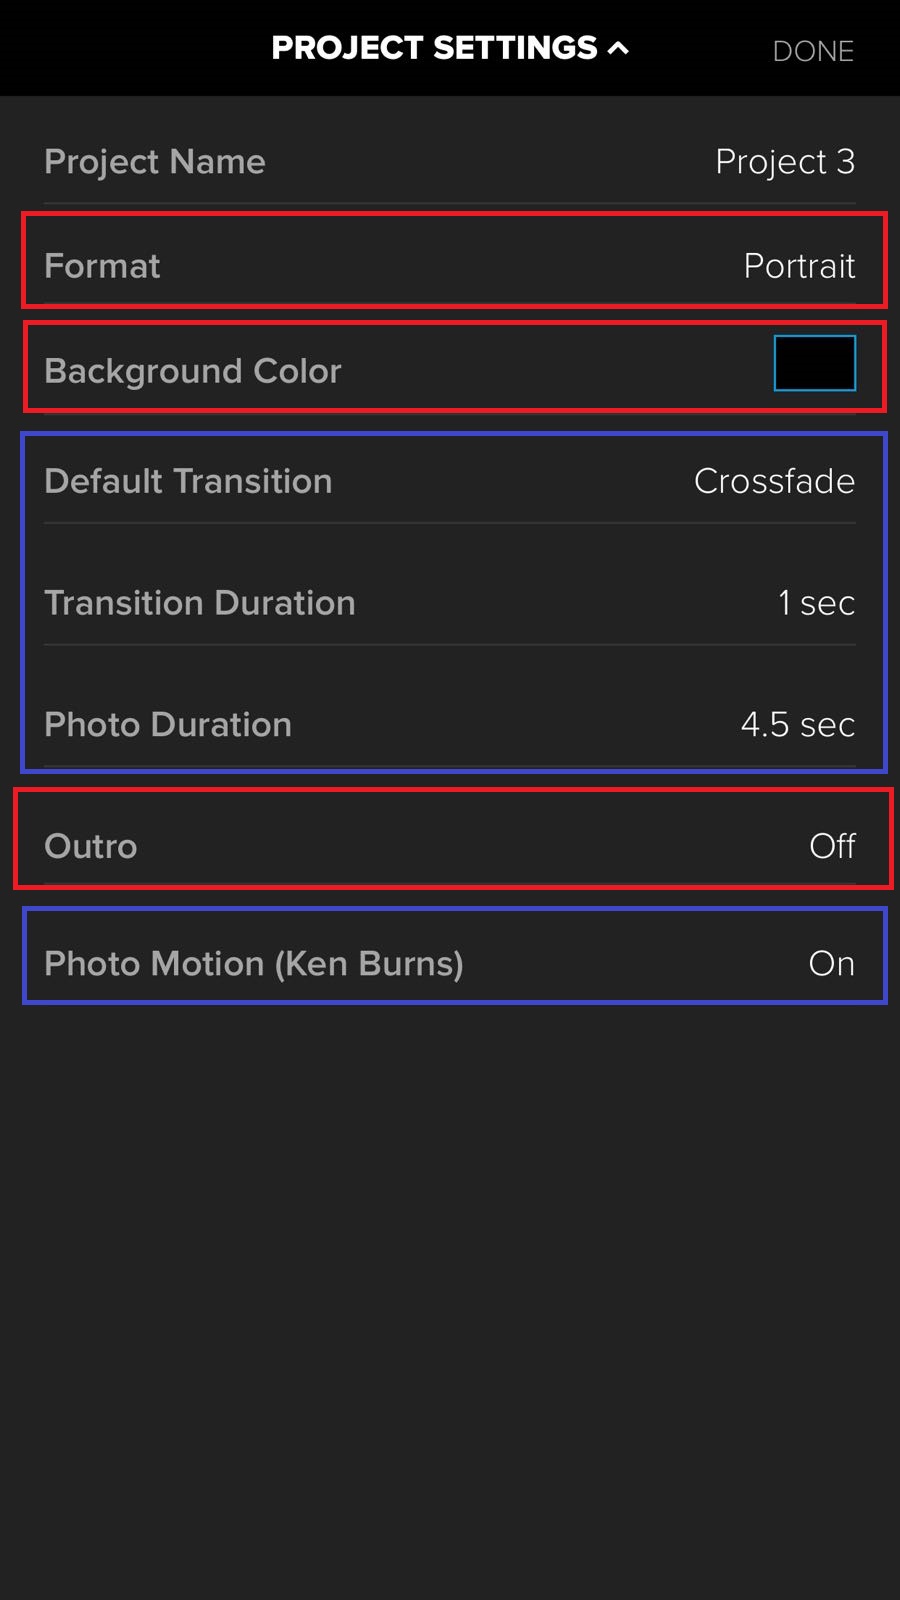
The most important one is the format. Here, you obviously want to have it on a portrait.
That’s how the app will take your video, and it will put it on a landscape vertical setting.
But we also see background color and outro. Background color is the color that will show behind your video.
And if you don’t want the app’s outro to show up after your video, then turn it off.
Every other setting that is covered by a blue color is mostly for photos, which in this case, you won’t need to worry about unless you want to have a photo video.
If this is the case you can do it all here too.
After you finish putting the settings that you want. Press “done.”
Step 4: Editing after your video was imported
Now, on this screen, there are a few things that I want to mention.
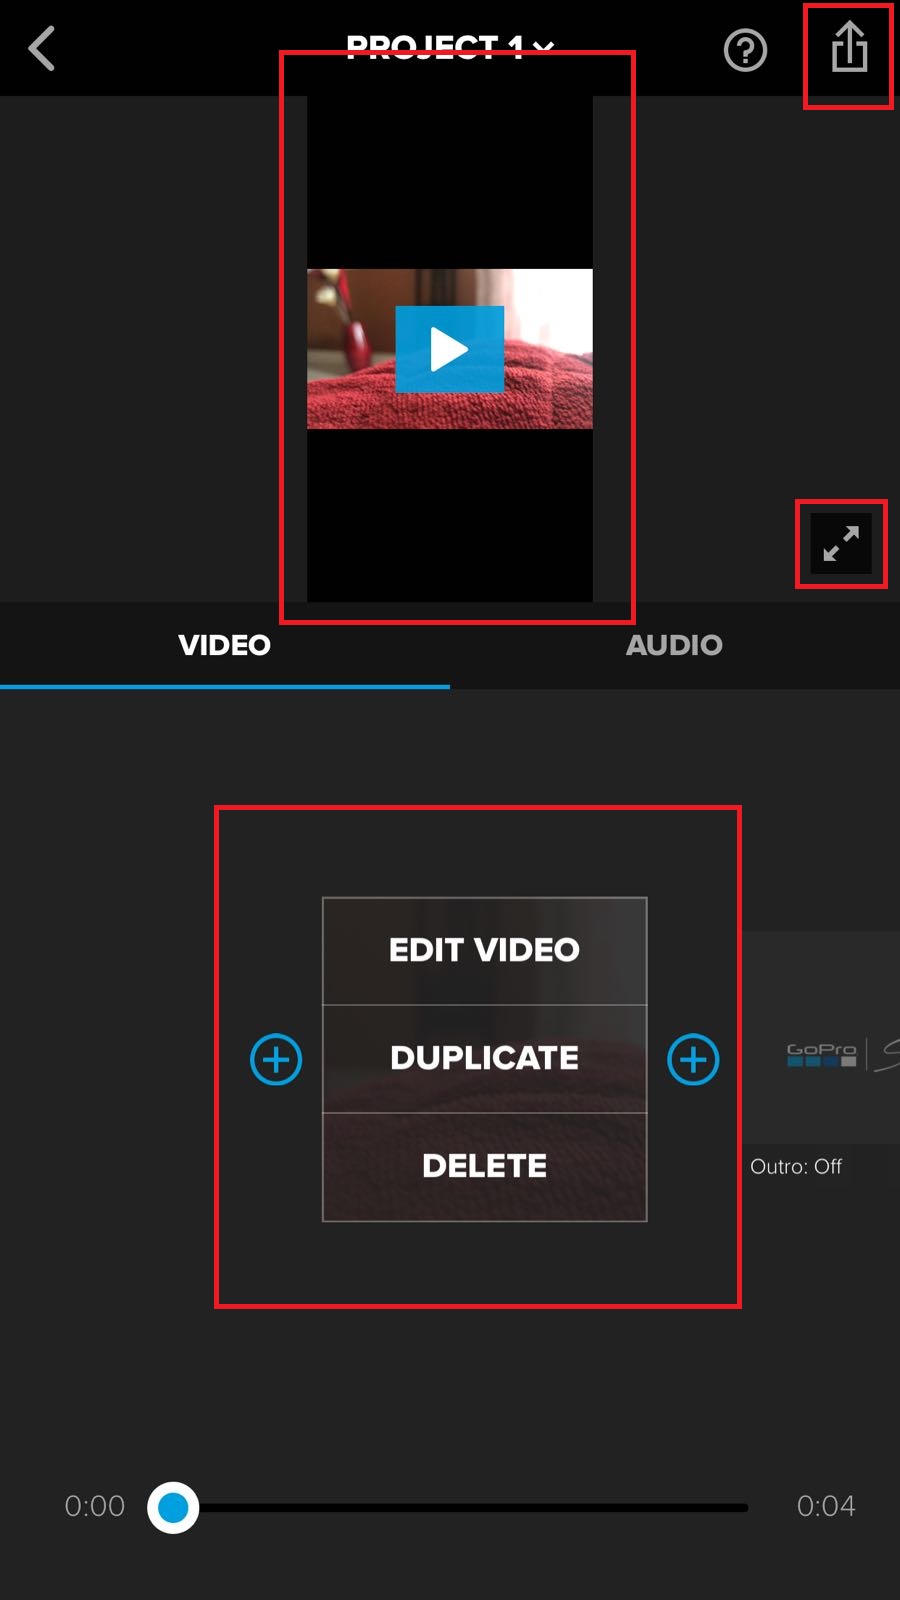
As you can see, my video is right there, with the black background that I selected, this is what I meant before.
Below that, there is an editing screen after you press your video.
You can duplicate it, delete it, or edit it.
Then aside from this two bix red squares, we have two other small ones.
The lowest one is to watch the full video in the same way that it will be shown on Instagram Reels, and then the one on top is to simply export it.
This last one is the one you need to press once you are happy with your video.
Step 5: Exporting your video
As of right now, the Instagram option of this app does not allow exporting to Instagram Reels, it only exports to your story and feed.
I’m 100% sure, they will have this feature in the future in which you can upload directly to Instagram Reels, but as of right now, you will have to do it like this…
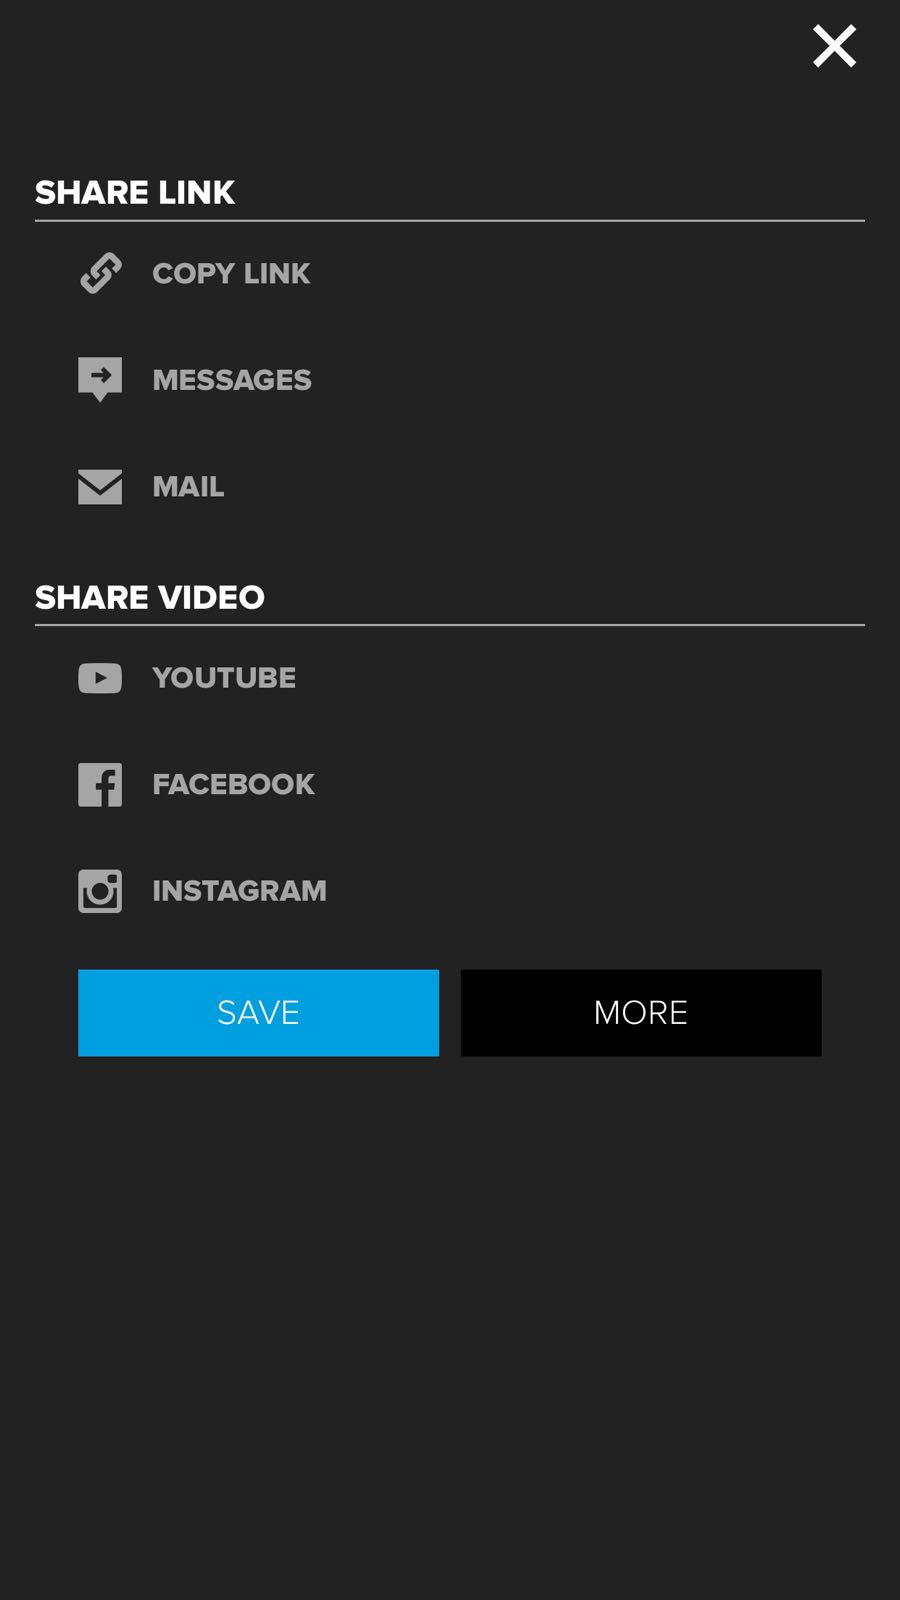
Just press “save”, and then go to your Instagram Reels channel, and upload it directly from there.
It will take a bit of time depending on the quality that you choose, but just like that, you learned how to upload a landscape video to Instagram Reels.
Instagram Reels landscape videos for Android:
Method: Screen record it
Step 1: Download a screen recording app on the Google Play Store
There are many apps for recording your phone screen.
The easy solution that we have found until now for Android user, is to record their whole video on portrait mode.
This will turn out with a black background, to upload it to Instagram Reels.
Step 2: Open the video
You want to open the video and make sure whatever is on screen is what you want to record.
Try pressing the screen so the edges go away.

So you have an idea, you would be watching your video like this.
The downside? You will have to “watch” your whole video.
It won’t take you more than 15 extra minutes max, since, for longer videos, you will have to use a computer, which I then recommend just using a regular video editor software.
Step 3: Crop the video if necessary
You will then want to crop your video if you record it yourself pausing the video, for example.
Then, after you do this, you will be able to upload your video to Instagram Reels.
Instagram Reels landscape videos for both iOS and Android:
Method: Using Instagram itself
Step 1: Open Instagram and open the story editor
Once you open the app, open the story editor, which will look something like this.
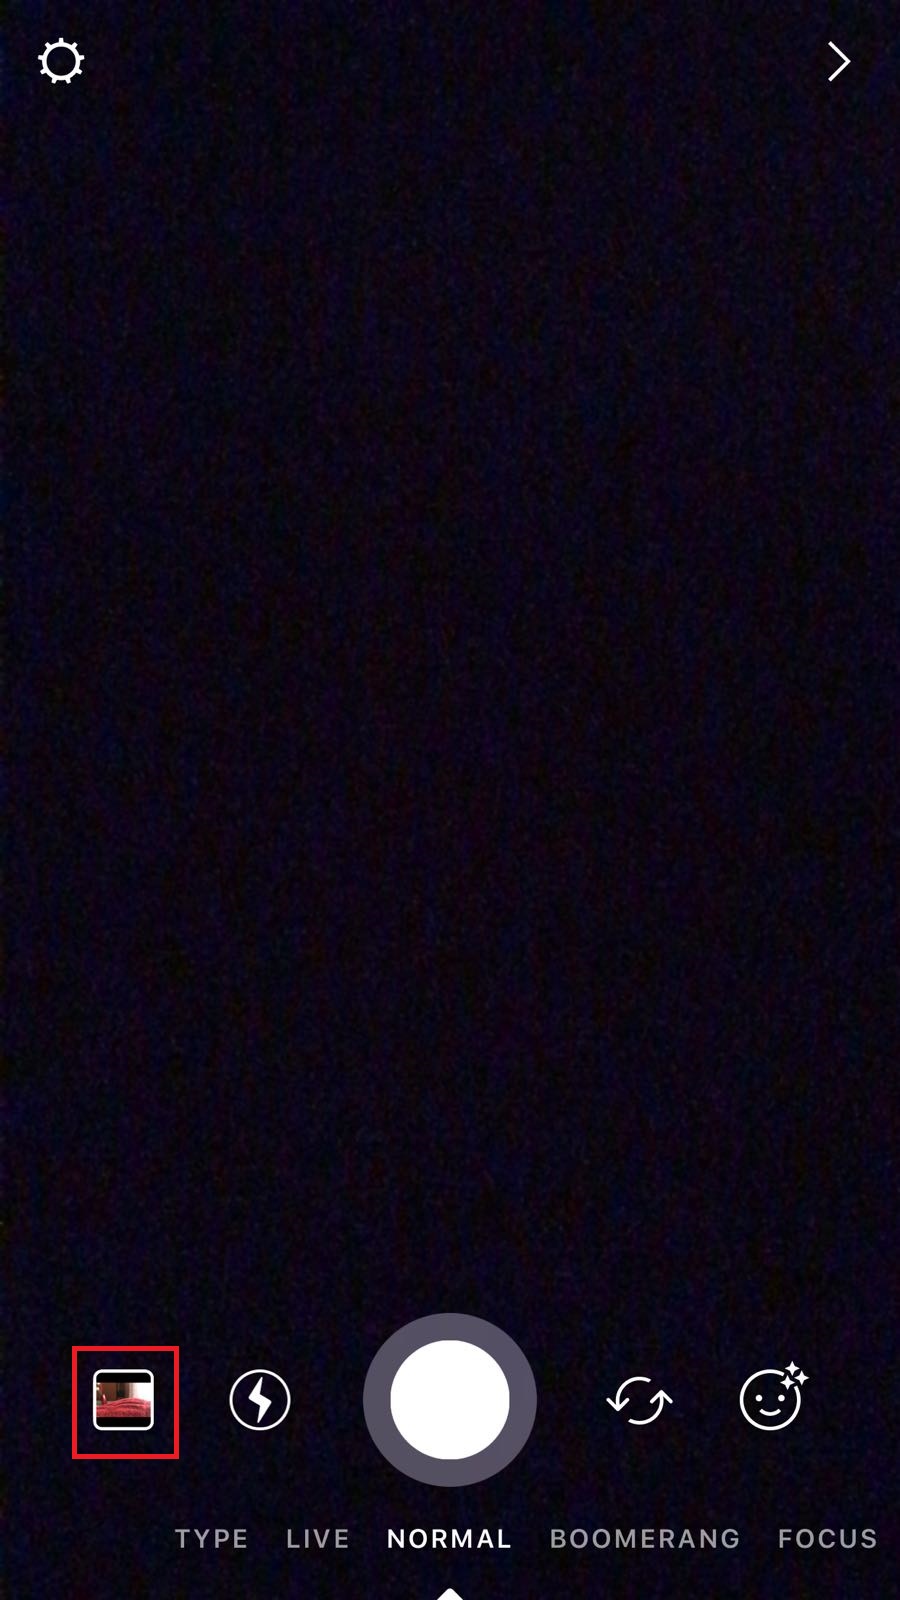
After you see this, press on the “add” button, which is located to your bottom left, and move to step 2.
Step 2: Select your video
Once you do that, it will look like this. Simply select the video that you want to post, and press it so it opens up.
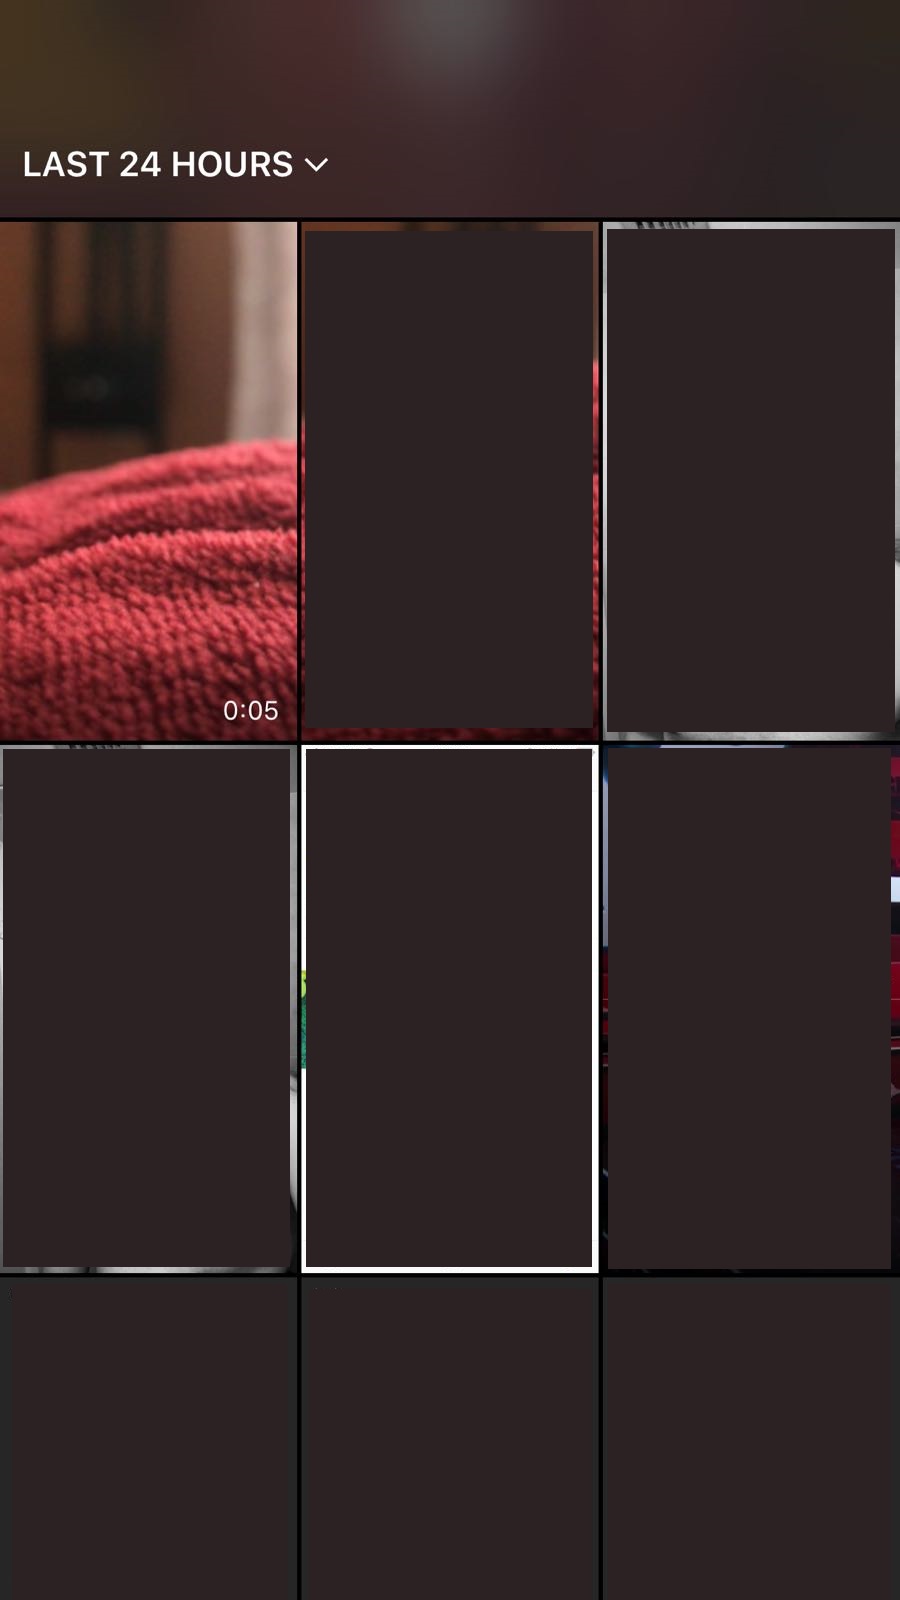
Step 3: With both fingers, open the video to a landscape format.
Do the same gesture as the arrows below pointing to the center.
Once you do that, the app itself will display your video like a landscape portrait.

Step 4: You can now save your video
Once you see something like this next screenshot, you are ready to save your video.
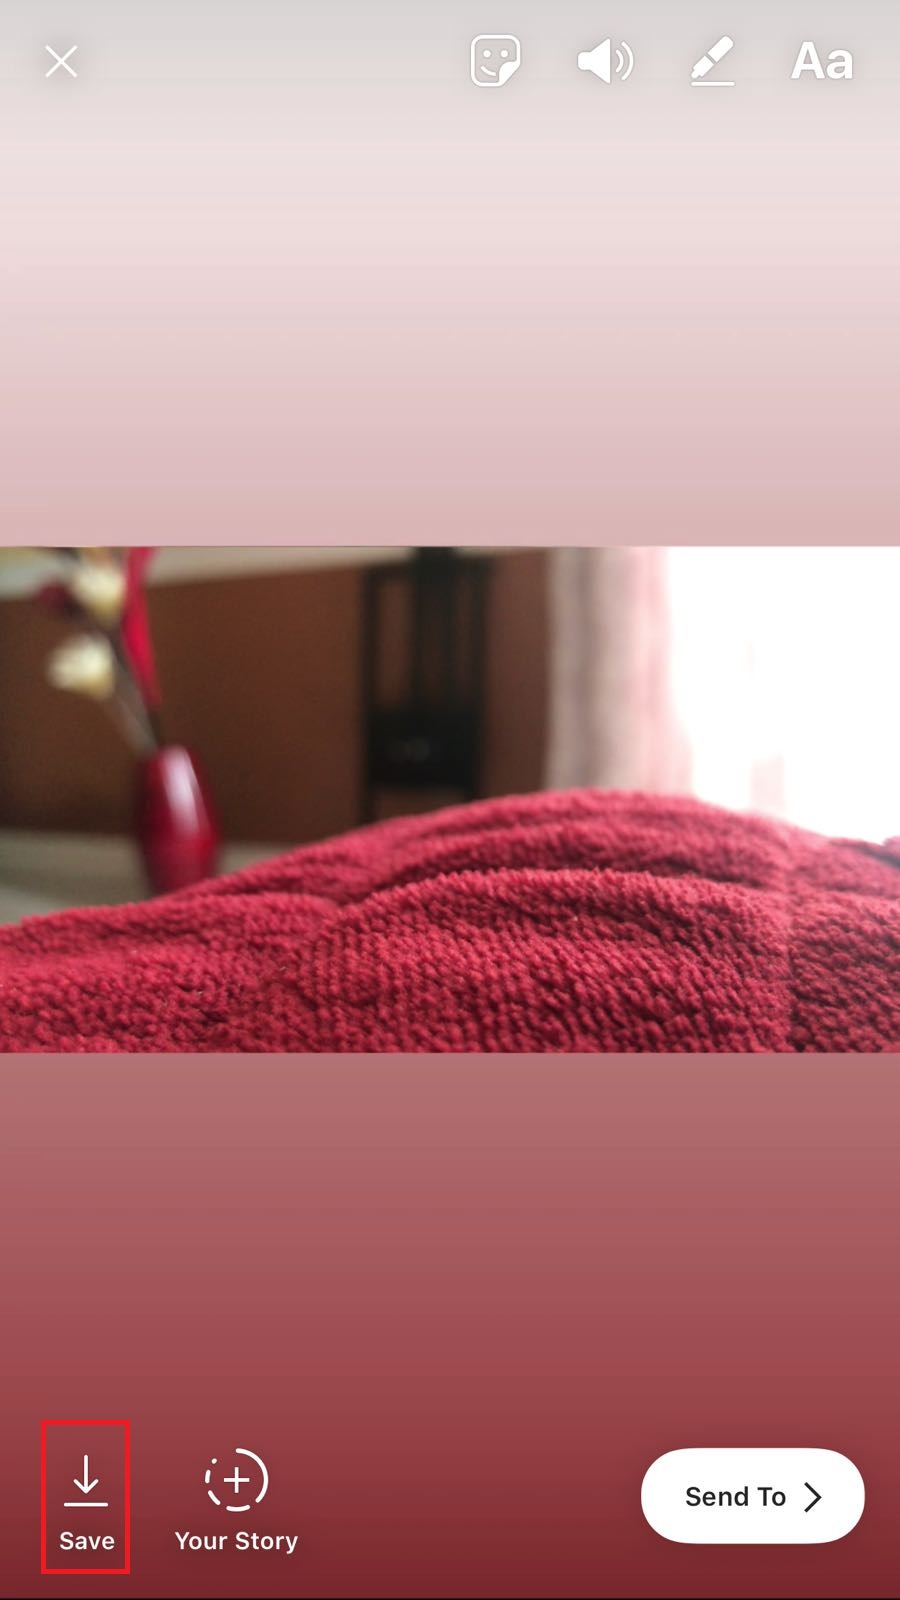
Just press the save button, and then you are ready to upload it to Instagram Reels.
As a side note, if you are trying to learn more about this new feature, I encourage you to watch this video:
She talks about how big of an opportunity Instagram Reels could be, and why you should give it a try.
Aside from that, this is a great beginner tutorial for any of you who are new to the social media world, and just need some help getting started.


